

Fall is upon us and Thanksgiving is almost here. In preparation for the holiday I wanted to spruce up my kitchen table with a fall centerpiece. To me nothing says fall like burlap crafts. I had just made a beautiful Fall Leaf Bowl (learn how to make one for yourself) and needed to liven up the dollar store pumpkins and pine cones I filled it with. The Fall Leaf Bowl will also set on a burlap table runner I made a couple years back so I knew the best way to tie everything together into one great centerpiece was to craft some burlap pumpkins!
I didn’t want to cover the dollar store pumpkins because they looked pretty the way they were so I decided to use some styrofoam balls I had instead. The styrofoam balls worked perfectly and made for some great looking pumpkins. There was no sewing involved which made the process even better.
Let me show you how easy these wonderful little pumpkins are to make. I am sure you could make them in any size but I wanted small cute ones that would fit well in my Fall Leaf Bowl.
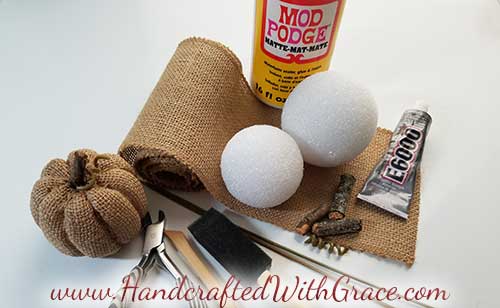
Supplies
Burlap ribbon or strips of burlap (Width and Length vary depending on size of styrofoam balls used. See Step 3.)
Styrofoam balls (I found a variety size pack at the dollar store)
Mod Podge
Sponge brush
Clay sculpting tool (Or anything like a plastic knife to push the burlap into the styrofoam)
E6000 glue (any strong glue will work)
Short pieces of twigs for the pumpkin stems
If desired green coated wire or floral wire (I used some leftover flower stems) for the little curly vine
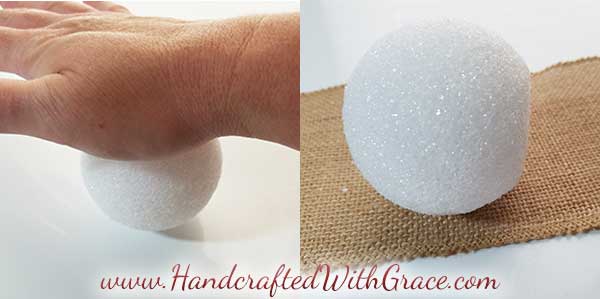
Step 1:
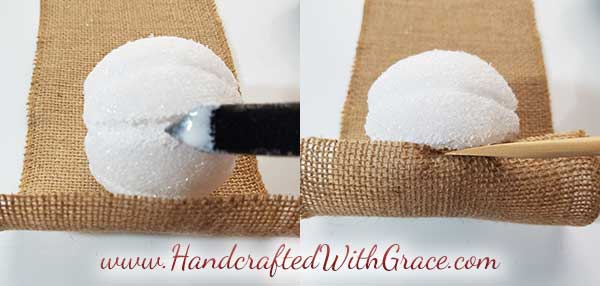
First we have to give the styrofoam ball the basic shape of a pumpkin. I simply used my hand to press the ball flat on the top and bottom. You can cut off the styrofoam to make both ends flat if you prefer but I found that flattening it with my hand was easier and didn’t make as big of a mess.
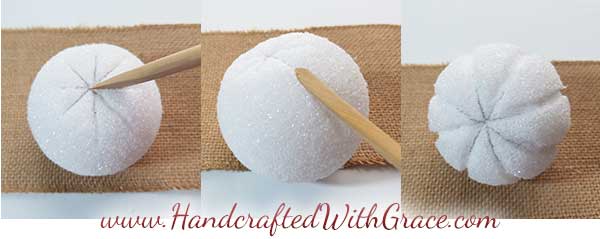
Step 2:
To continue shaping the ball into a pumpkin draw a star into the ends like in the picture below. Then, using a clay sculpting tool or any blunt object press the lines from top to bottom to give your ball the indentations that are typically found in a pumpkin. You don’t have to have perfect or symmetrical lines because pumpkins don’t grow perfectly anyway.
Step 3:
Now is the time to get the burlap to approximately the right length. The width of the burlap should reach from a little over the top of the ball to a little over the bottom of the ball. Basically, just a little longer than wrapping the burlap half of the diameter of the ball. The length should be approximately 1 and 1/2 times around the outside of the ball like in the picture below.
Step 4:
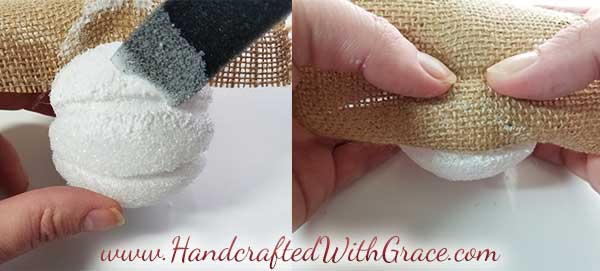
Once you have the right length of the burlap and the indentations are in place the next step is to secure the burlap over the styrofoam ball. I only used Mod Podge in the center area of the ball so I could secure the top and the bottom into place like in Steps 8 through 11. Working on just the center portion of the ball and wrapping the burlap around made it much easier to get clean lines on the top and bottom of the pumpkin.
Start by adding some Mod Podge to the styrofoam ball in the center of the ball and then pushing the end of the burlap into the pumpkin so you don’t see the raw edge of the burlap.
Step 5:
Flip the project over and continue adding Mod Podging to the ball and pressing the burlap around the center of the pumpkin.
Step 6:
Work all the way around the pumpkin pressing the burlap into the indentations that you made earlier. Once I had applied the Mod Podge and burlap all the way around the center of the ball I secured it with rubber bands for about 10 minutes just to give the Mod Podge a chance to start drying. This made my creases look much more defined and it was easier to work on the top and bottom of the pumpkin.
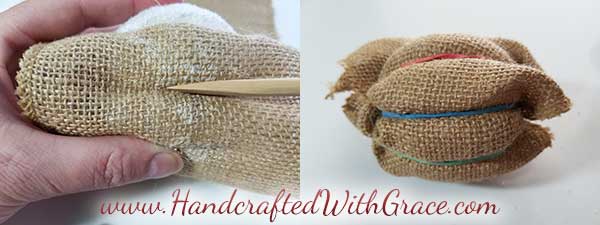
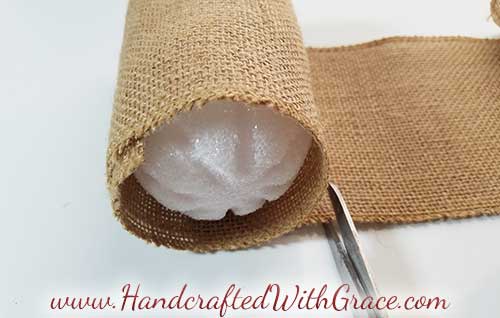
Step 7:
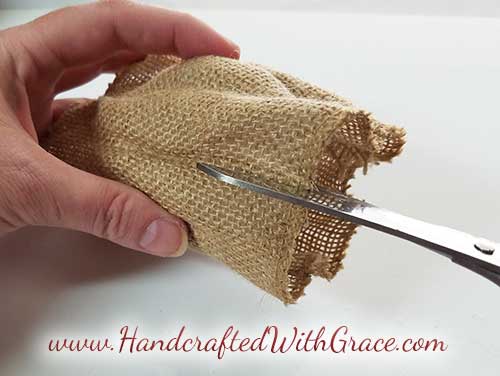
Take off the rubber bands and cut off the excess burlap along the last indentation. Press in the end of the burlap so that you cannot see it. I pressed it in fairly deep but not so deep that the indentation looked strange.
Step 8:
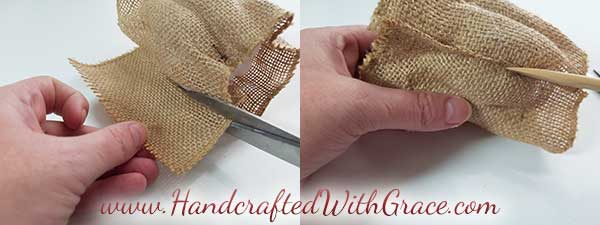
Cut the top and bottom ends of the burlap along the line of the indentation.
Step 9:
Apply Mod Podge and press down the first newly cut strip.
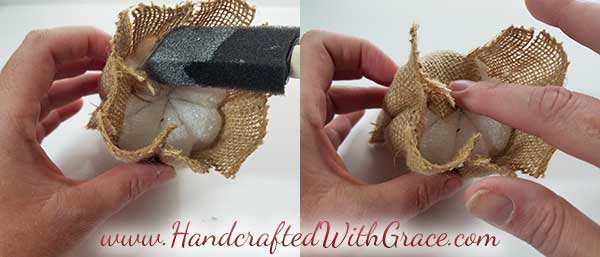
Step 10:
Trim off the excess of the strip into a triangle shape and press into place. Use your clay sculpting tool or blunt object to push in the edges of the triangle shape at the end of the burlap strips.
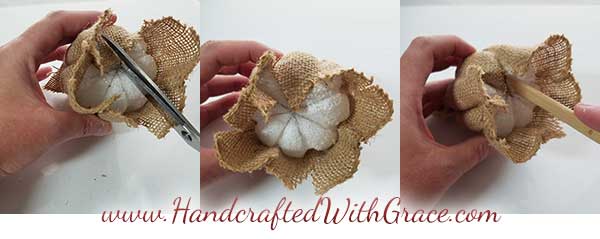
Step 11:
Continue working around the end of the pumpkin until all strips are pressed in place. Then repeat the process of Steps 8, 9 & 10 so that all strips of burlap on both sides are firmly in place like in the photos below.
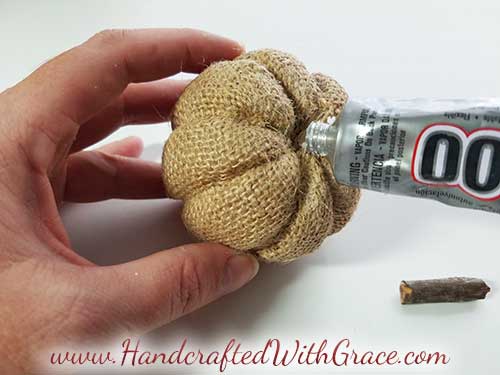
Step 12:
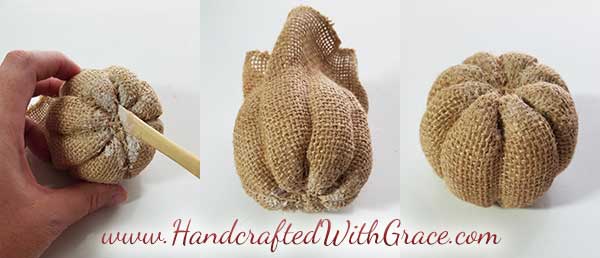
Last but not least, glue into place a small piece of a branch or any other type of stem you desire. You can also add a small piece of floral wire to give the look of a piece of vine or a small leaf if you prefer. I used an piece of green floral stem left over from some old silk flowers for my vine piece. I just wrapped it around a pair of pliers to give it a curly cue shape.
Now your pumpkin is complete. They turned out so adorable!!!
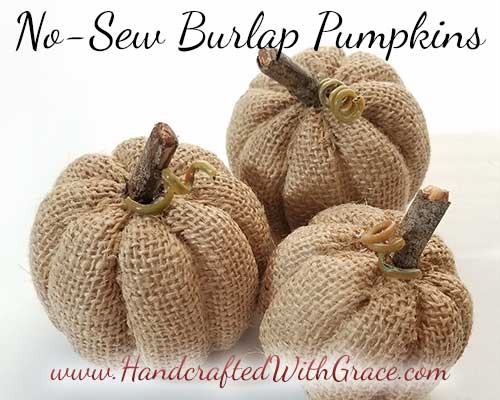
I made a few pumpkins to add to my Fall Leaf Bowl and it gave it just the right amount of character for my table. I would love to hear from you any questions you may have or how well your Burlap Pumpkins turned out so be sure to comment below and share the link with your friends and family through the share buttons below.
Happy Fall Ya’ll!!!
Wow these are so cute what a great idea.. would make a great gift to give for thanksgiving dinner..
Oh they would make a great hostess gift! Especially paired with the Fall Leaf Bowl!
Oh that’s a great idea! They would be a wonderful hostess gift!
Gosh, these are so cute!! What a clever idea 🙂
Thank you Melodi,
They are super easy too!
I think they look awesome
Thank you. They are quite easy and fun to do. Just a little burlap and next thing you know… pumpkins!!
Thankyou for the great idea, super easy for a craft night with my friends.
So glad you like the idea. I would love to see some pics of how the burlap pumpkins turned out.
Beautiful!
Thank you so much! They are also really cute stacked up with pine cones in the Fall Leaf Bowl!
Great idea! Thank you.
Thanks Laura. They are so much fun to make. They also look great in the Fall Leaf Bowl!
These are so cute ..tks for sharing and I will definitely try it 🌻😊
They are so adorable, will plan to make them.
I Find exciting to try, thanks for showing
I love these pumpkins. I will try to make some. Great decor and they are so cute.
These are so cute. I can’t wait to try making them. Thanks for the idea!
Thank you. Beautiful and easy craft.
Very easy instructions and many pictures are helpful. Thank you!